Mounting Network Shares on My Home Lab (NFS vs SMB)
Intro
Now that I've set up all of my main home-lab · nodes and resolved all networking issues, it's time to create my network drives and mount them to my PROXMOX VMs.
Related Resolved Issues
Goal
My main goal is to implement a network share so my VMs can access and store files on my UNRAID parity/storage pool. Node 2
To achieve this, there are a few things I need to set up on both my PROXMOX and UNRAID environments to ensure I implement this correctly.
I also want to ensure I have security and isolation to protect my data from the network. Even though it's a home lab home-lab , publicly broadcasting my storage drives with read or write access would violate all my planned security measures. I want to implement the principle of least privilege (PoLP) when it comes to access to these drives.
Setting up network files
This process should be fairly easy with the way the UNRAID interface is set up. I plan on creating 3 main shares
- Public Storage
- Private Storage
- Vaulted Storage
Share Creation
I started off by creating the PublicStorage share
Share Configuration Screenshot
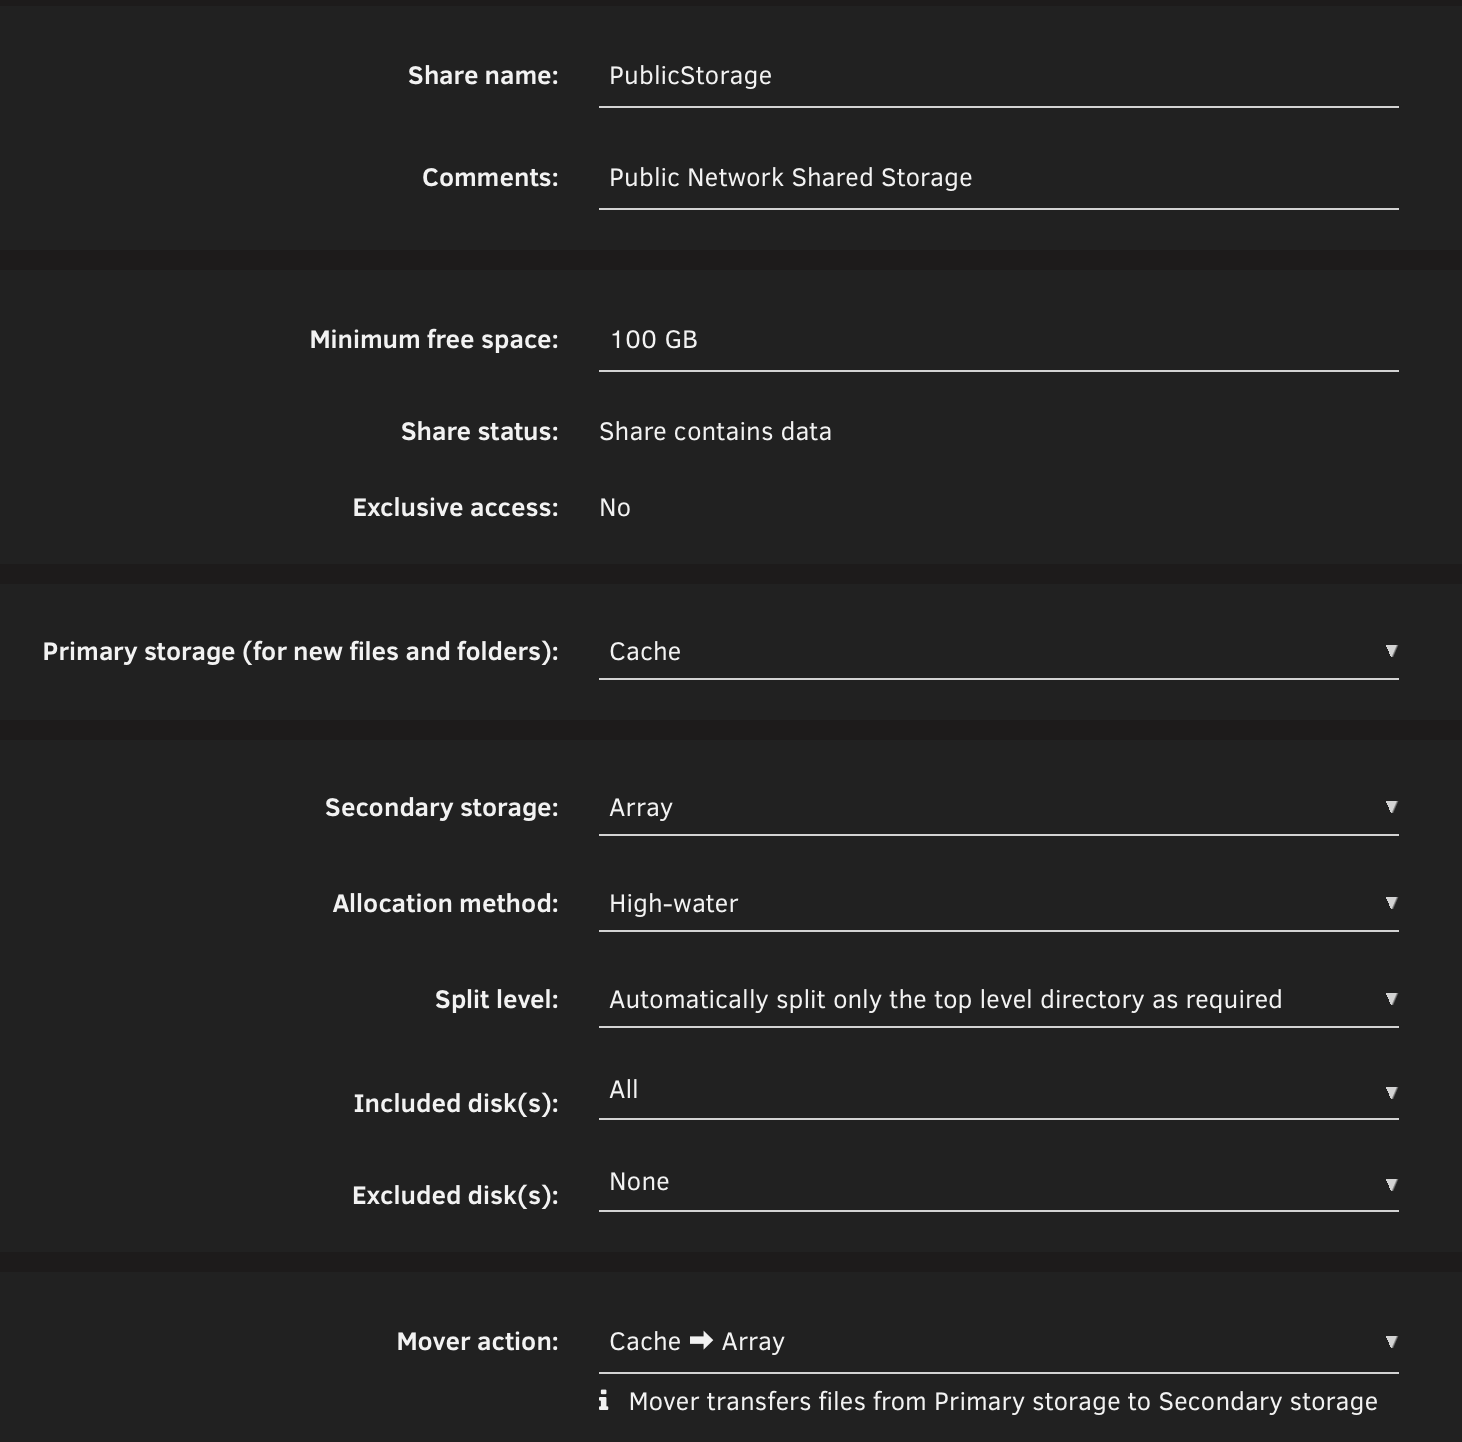
These are the settings I'm using for all my shares
"Primary storage" routes all storage to my 1TB cache drive for faster speeds and dumps it all to my HDDs later at night. This system is good because it utilizes SSD speeds and doesn't bottleneck with the slower HDD speeds. Also, my HDDs won't be spinning up and will be spinning down most of the time to prevent unnecessary wear and tear.
I used "High water" as my allocation method because it fills all my drives instead of filling one drive to capacity and then moving on. HDDs don't like being filled to capacity, so I'll avoid that while I can.
I set my split level to "Automatically split on the top level directory as required" to prevent my storage pool from isolating media files and metadata under the same folder on different drives. It'll keep those together while still using the high water allocation method.
Mover action from cache to array means that at some point all storage temporarily stored on the cache drive will be moved to the HDD array for a permanent home for the data.
Access Control and Security
As I said before, I want to implement the principle of least privilege. I want to ensure only users with the appropriate credentials can access these files to prevent any unwanted tampering.
Users
Personal User Creation
The first user I created was my own. When I deploy the network share and access my files from different clients, I want to ensure I'm using a personal account with its own privileges since root has full authority. Also, I can't sign in as root anyway, which makes sense.
Proxmox User Creation
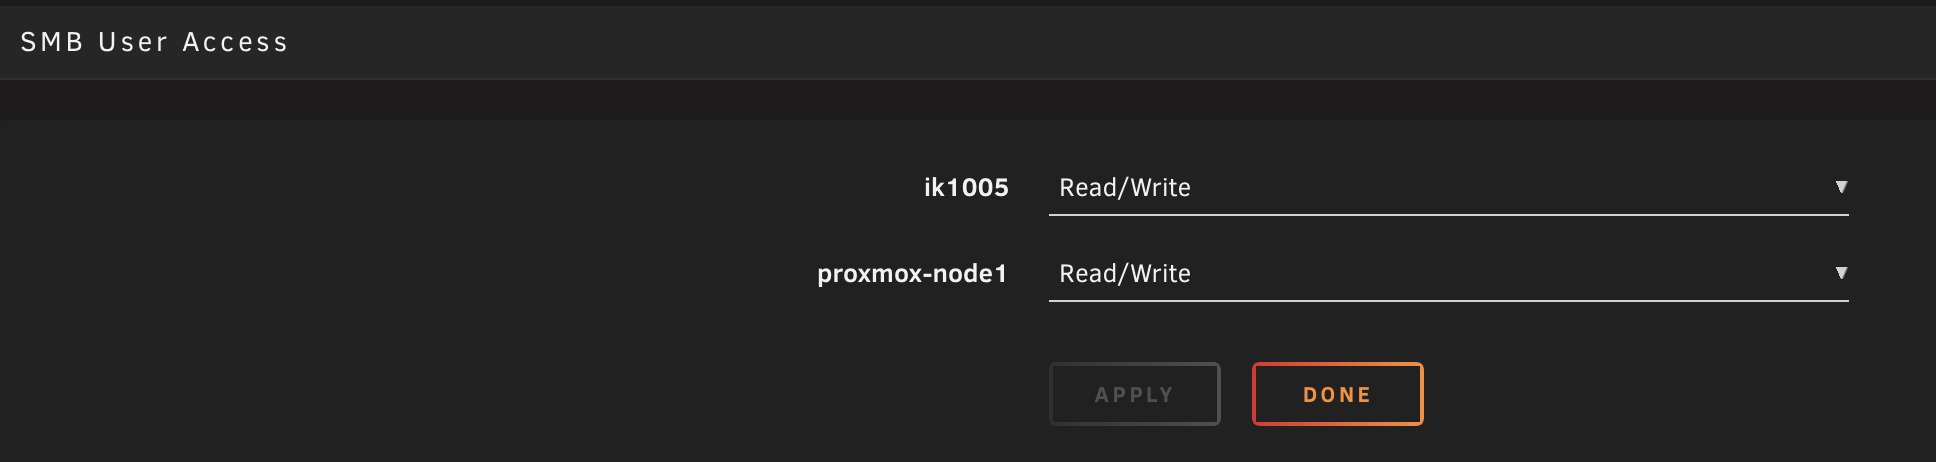
I didn't want to use my personal credentials when mounting my share to Proxmox for a couple of reasons. First, in logs I want to ensure I know Proxmox is making changes and it's not me by mistake. Second, Proxmox and I will have different privileges. I'm only going to give myself and Proxmox access to the shares we need and nothing else to prevent any issues in the long run.
User Access Screenshot
Share security
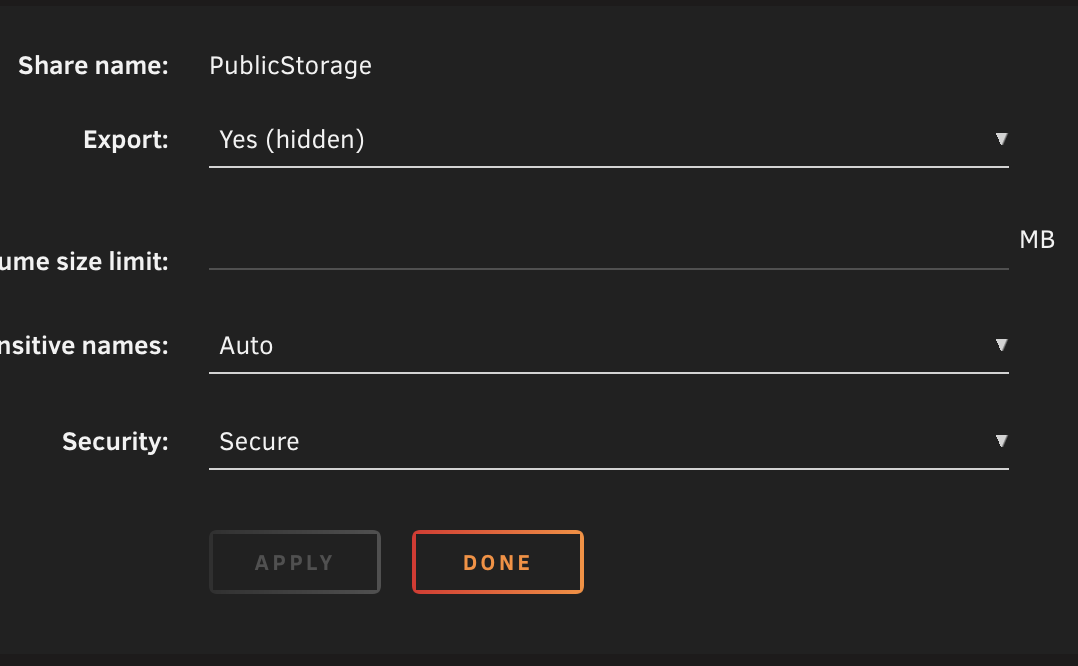
There are different levels of security in UNRAID, but for almost all my shares I'm going to use secure mode and also hide my network shares from the network.
Initially I was going to set the public share to public, but I don't want my files broadcasting throughout the network. Any network scanner would find this with little effort. Instead, I'm using secure mode, which requires credentials with read/write access to these shares. This is a more secure approach, and I don't want any unwanted guests tinkering with or modifying my data.
SMB setting screenshot
Accessing my network from my MacBook
Process
Go to Finder, click Go and select Connect to server
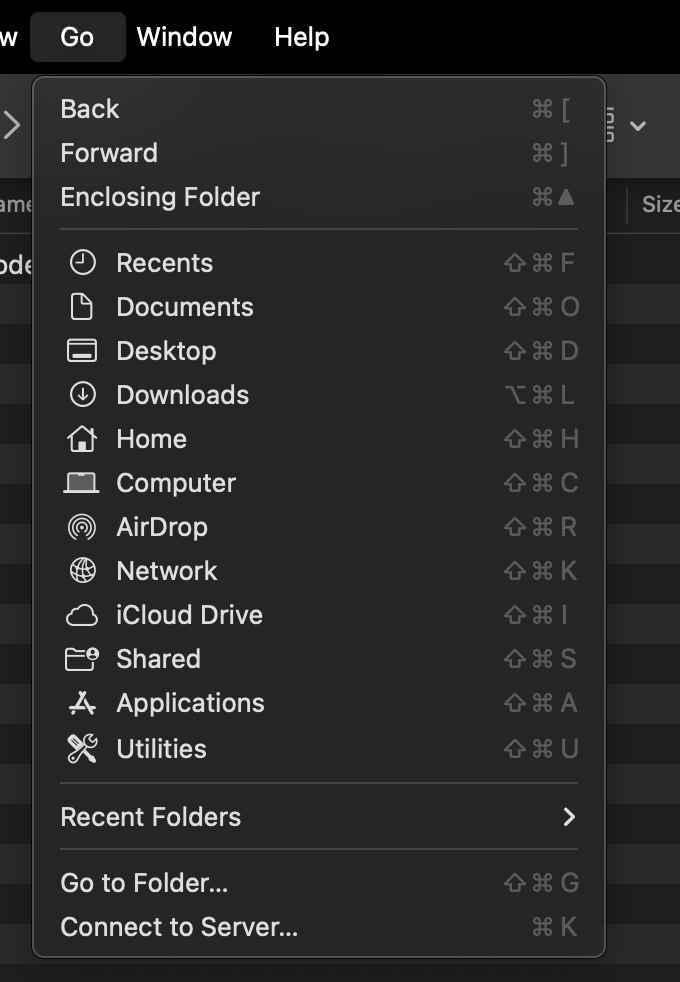
Connect with smb://192.168.X.X/ShareName
Type in the IP address of the host
In my case, my UNRAID node — then fill in the user credentials
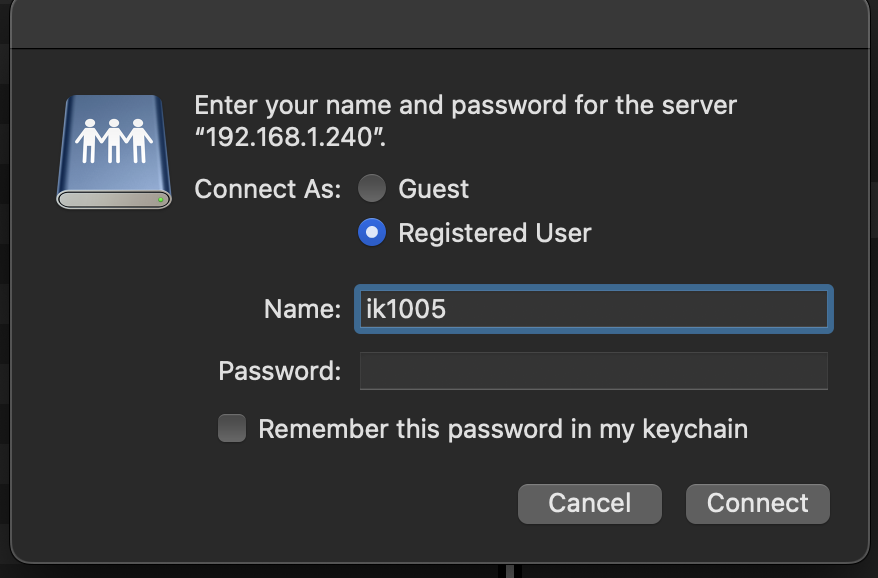
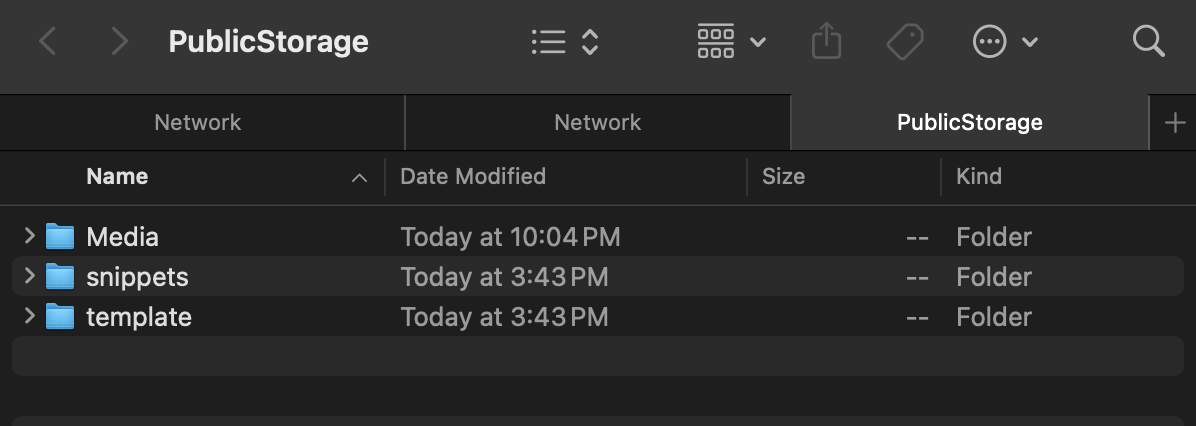
Just like that we're connected
Mounting my shares to my PROXMOX environment
This is where things will get tough. Throughout this process it has been fairly simple, but now I'm dealing with a Linux-based OS and mounting this inside another Linux-based VM and also connecting this to a service that runs in Docker.
Goal
- Mounting to Node
- Mounting to CT
- Connecting to drive through a running docker service
The service I'll be testing this on is Jellyfin. I already uploaded some saved media in the Media folder in my share. I also plan on setting up my home streaming service, though I won't be documenting much since it's a simple task. It's a good place to test.
Mounting the share to Node 1
First we have to mount the share to my datacenter machine through the Proxmox interface. In the datacenter, go to Storage and add a network SMB/CIFS. UNRAID supports NFS but since I set up my share security with SMB, I'll keep using SMB and leave the other methods disabled.
When you're in the Add SMB interface, you can type in credentials to mount your shares to your datacenter.
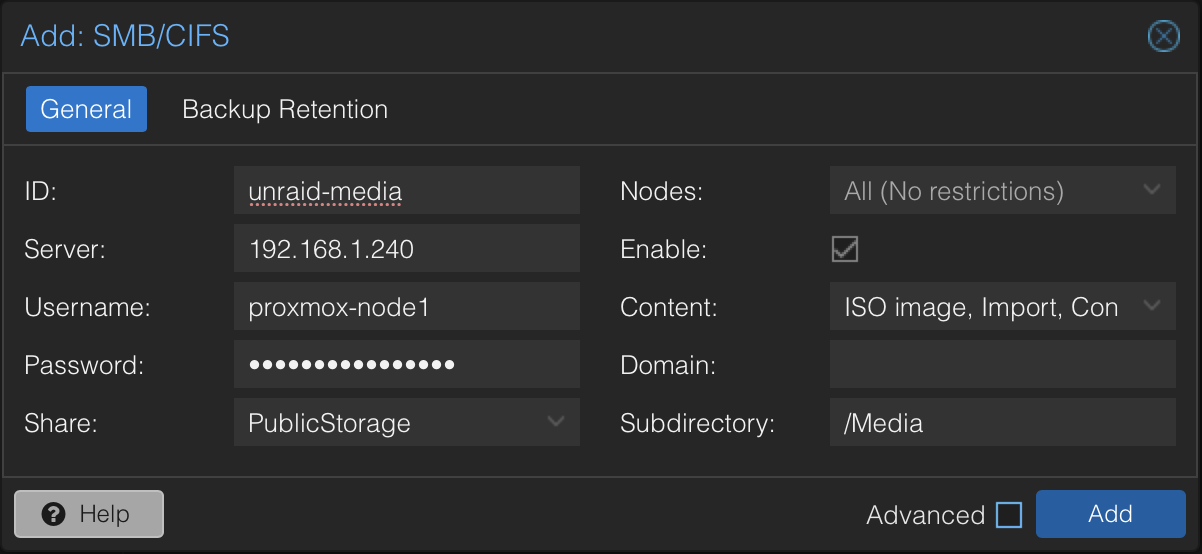
- ID: The name UNRAID sees the share as
- Server: UNRAID Server IP Address
- User/Password: The Proxmox credentials from here
- Share: The root share name
- Subdirectory: The main folder the mount points to
When you mount shares through Proxmox, you're required to set them up in your datacenter. You can assign them to certain nodes, but in my case I only have one node using Proxmox. The issue is that even though it's mounted to the node, to follow the PoLP I don't want the VMs/containers I give access to have access to the whole share. My media-docker LXC only needs access to that media folder, nothing else in the public storage, to prevent any unwanted tampering or unknown backdoors from vulnerable machines.
Accessing the share from my Linux LXC
One of my LXCs is an Ubuntu Linux distribution that runs only Docker; inside Docker is where I'll run all of my media-related services.
First I need to connect to this share through the LXC terminal.

When attempting to access this directly on my node, the share isn't found by the system. After some research I learned that just connecting the share to the datacenter isn't the only step; next I need to mount it to that node and LXC specifically.
First I must go to my node terminal and do the command
nano /etc/pve/lxc/100.conf - 100 is my media container ID
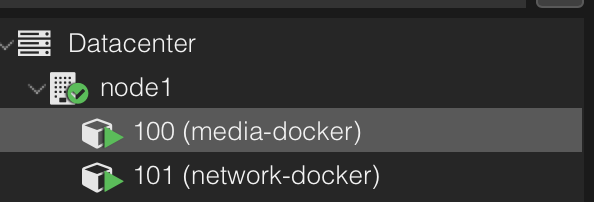
When inside this config, we must modify it to pass through that storage as a secondary (or extra) hard drive for the machine.
mp0: /mnt/pve/unraid-media,mp=/mnt/unraid-public
-
mp0: is the external drive number; if I added another it would bemp1tompX -
/mnt/pve/unraid-media: is the path on Proxmox I created when creating the share./mnt/pve/share-name mp=: is telling the terminal to take the source storage share path on the left and point it to the destination on the right/mnt/unraid-public: is the path of the share on the Linux machine. This can be named or set to whatever path I want.
I'm going to actually use
mp0: /mnt/pve/unraid-media,mp=/mnt/unraid-media-share
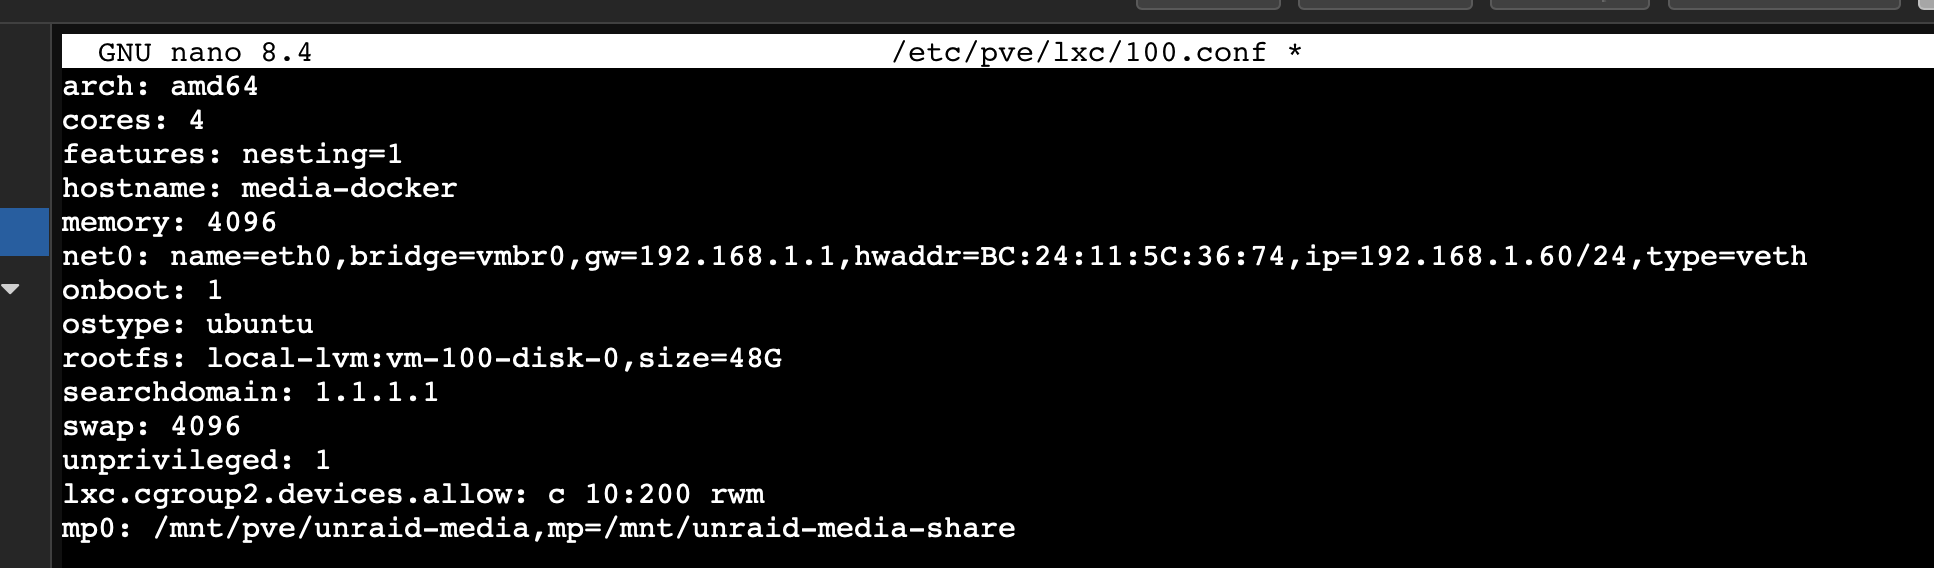
Just drop it in at the bottom and save and it'll mount to that LXC.
When I attempt to access this from my container terminal I'm getting the same error

Our system doesn't think it has the permissions to access this directory, so we grant it the permissions with this command:
chmod -R 777 /mnt/pve/unraid-media-share
chmod: Change Mode (Change Security Perms)-R: Recursively (On all folders and subfolders)777: Read/Write/Execute to Owner/Group/Everyone else/mnt/pve/unraid-media-share: Target directory
Ensure you reboot the container so all previous edits apply.
Now I'll just run ls -la /mnt/unraid-media-share to ensure my share is mounted
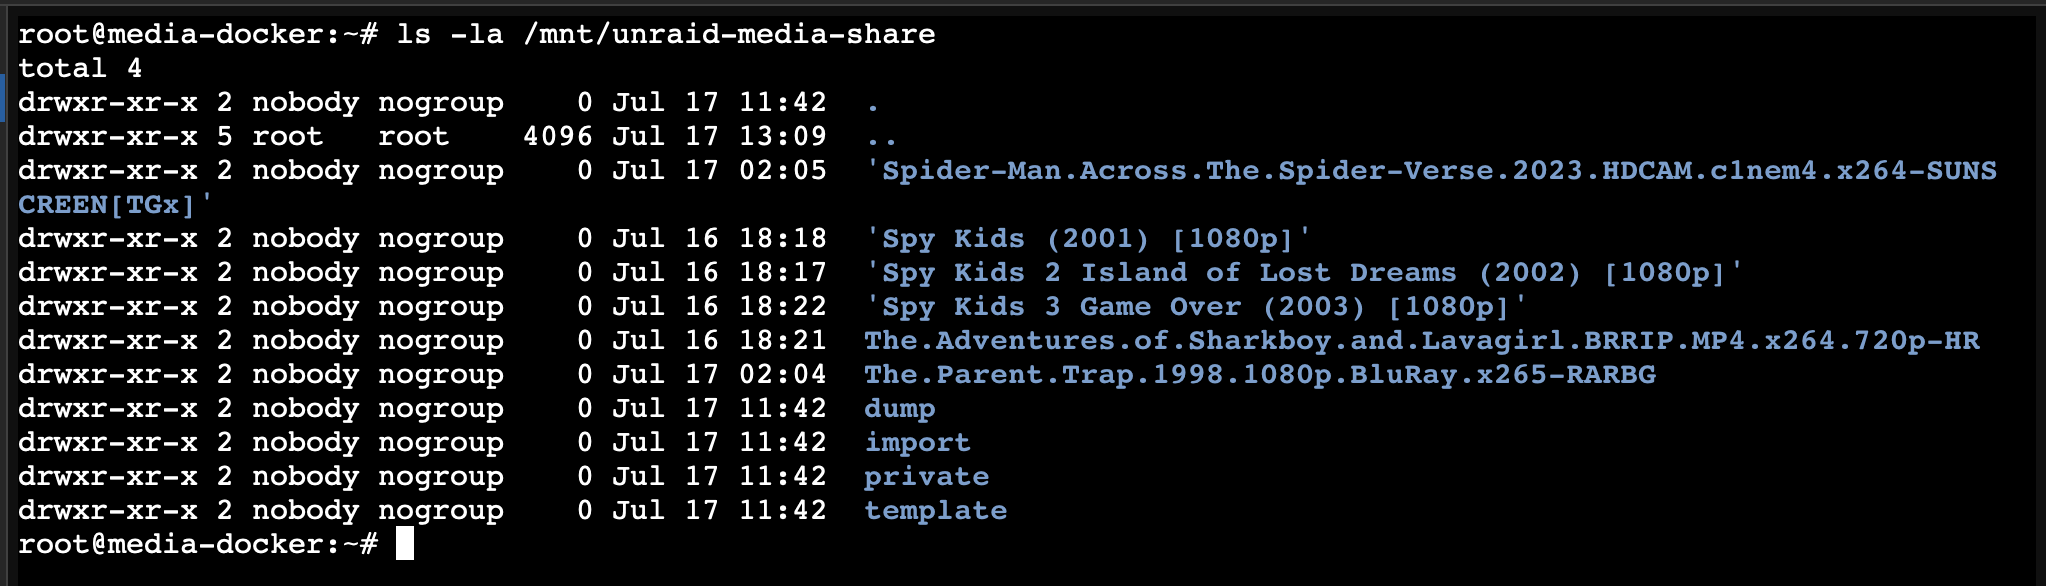
And our share is officially mounted and accessible to my system.
Mounting to docker container
Since I'm using Docker, that's a whole separate environment used to host my services. I've already successfully passed my share through Proxmox and the media-docker LXC, but now I need to pass it through Docker.
Jellyfin mounting error when passing directory path
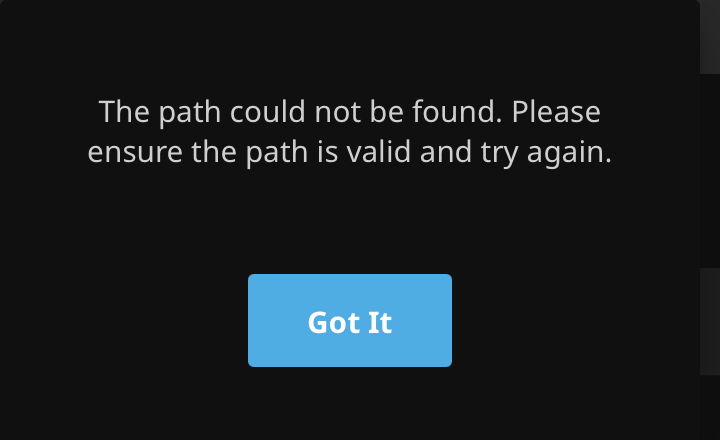
Solution
To fix this issue, all we have to do is go to our Docker YAML for the stack and add the path. Since I'm using Portainer to manage all my Docker environments, I'll edit the stack there.
I just have to add /mnt/unraid-media-share:/media in the volumes section of my Docker YAML and redeploy the stack.
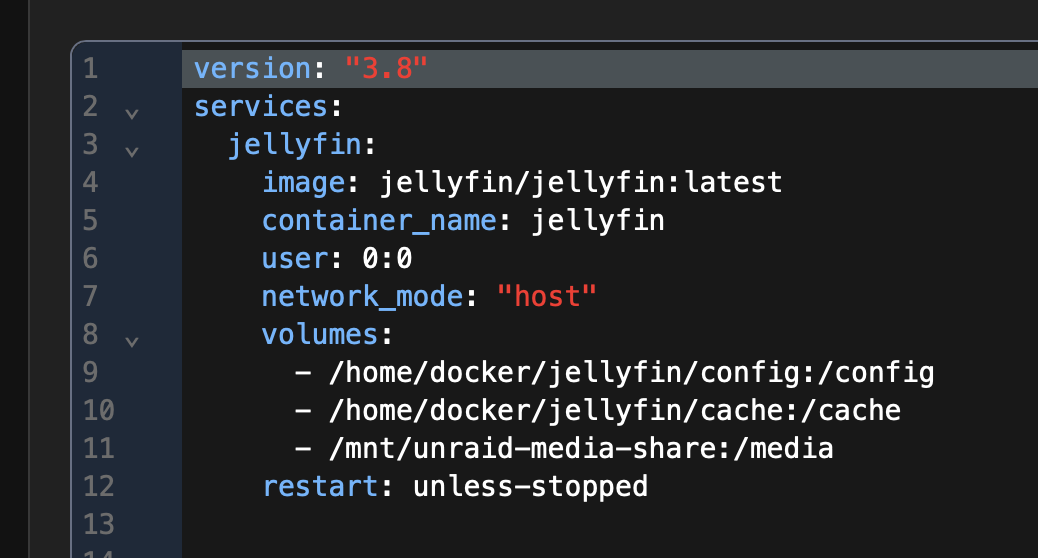
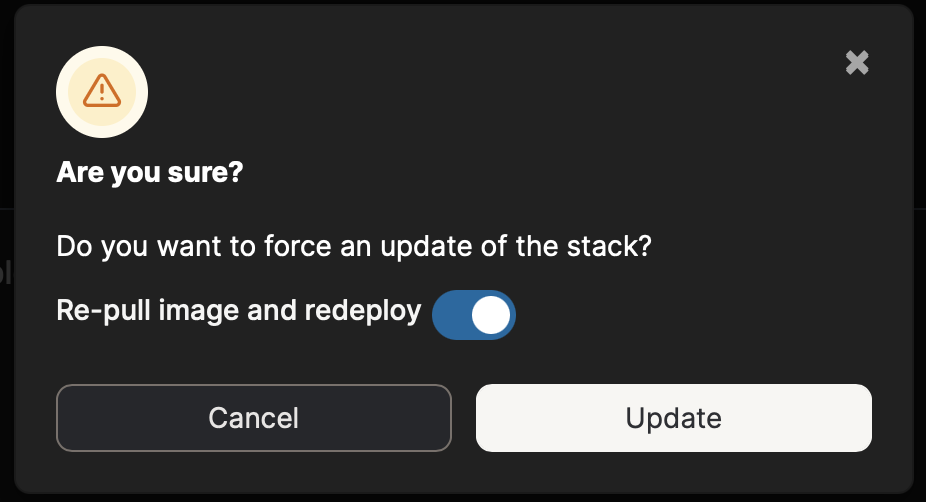
After this you should be able to access your directory in the Docker container.
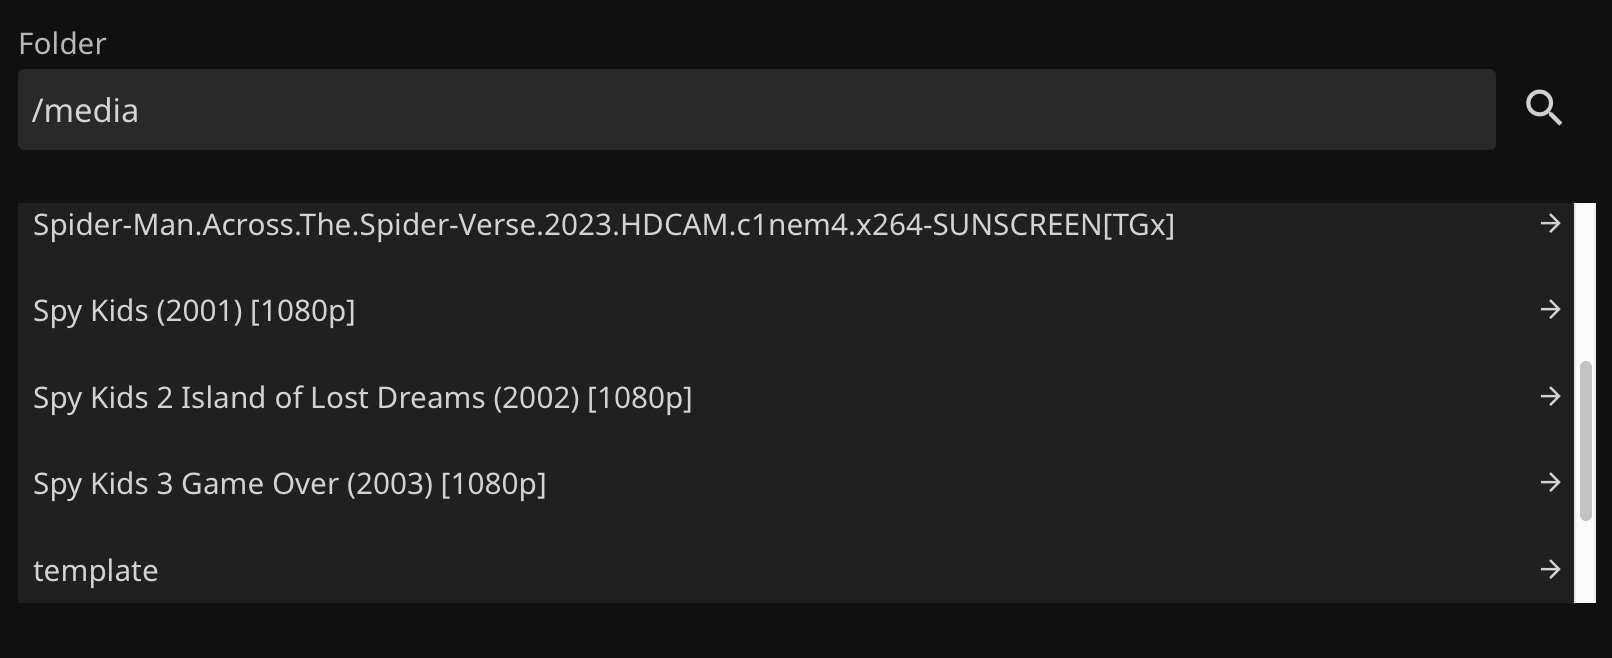
Conclusion
Overall, this process was fairly simple, though a bit tedious. It makes sense considering I'm passing through different machines and multiple virtual environment stacks. It's also good for security and for applying the PoLP rule on every virtual environment to protect against corruption or exploits in my system.